Steel strips race through rolling mills at up to 1,200 meters per minute. Human eyes blink every 3-4 seconds. That simple math explains why manual inspection has become the weakest link in modern steel production. Research shows human inspectors miss 20-30% of defects—and that number climbs higher with fatigue, shift changes, and the microscopic nature of critical flaws. When a single undetected crack can cause a customer recall worth millions, the question isn't whether to automate inspection—it's how fast you can deploy it. This guide examines exactly why manual inspection fails in high-speed steel environments and the technology replacing it. Schedule a consultation to assess your inspection gaps.
Why Manual Inspection Cannot Keep Up in Steel Plants
The Human Limitations Costing Steel Manufacturers Millions in Defects
Human Biology vs Steel Production Physics
The fundamental mismatch between human capabilities and modern steel production demands.
Human Inspector Limits
Steel Production Demands
The Gap: At production speeds of 1,200 meters per minute, steel travels 20 meters during a single human blink. That's 20 meters of potential undetected defects—every few seconds, every shift, every day.
The 5 Reasons Manual Inspection Fails
Evidence-backed analysis of human inspection limitations in steel manufacturing.
Fatigue-Induced Accuracy Decline
Research shows inspectors struggle to maintain focus beyond 10 minutes of continuous visual inspection. On 8-12 hour shifts, accuracy degrades significantly—especially during night shifts when circadian rhythms are disrupted.
Speed-Accuracy Tradeoff
Human inspectors can thoroughly examine 2-3 samples per minute. Modern hot strip mills produce steel at 1,000-3,000 meters per minute. This forces manufacturers to choose between thorough sampling (missing defects) or cursory inspection (compromised accuracy).
Microscopic Defect Invisibility
Critical steel defects—micro-cracks, inclusions, subsurface voids—often measure under 0.1mm. The unaided human eye cannot reliably detect these flaws, yet they cause structural failures, customer complaints, and warranty claims.
Subjective Judgment Inconsistency
Two inspectors often disagree on whether a defect is critical. Without objective, quantifiable standards applied consistently, accept/reject decisions vary by individual, shift, and even time of day—creating unpredictable quality outcomes.
Environmental Interference
Steel plants present hostile inspection conditions: extreme temperatures (up to 1,000°C near hot rolling), dust, vibration, noise, and poor lighting. These factors compound fatigue and further degrade human detection capabilities.
What Missed Defects Actually Cost
Financial impact of manual inspection failures in steel manufacturing.
Detection Point
After Processing
At Customer
Product Recall
of manufacturers experienced product recalls in the past 5 years
— ETQ 2024 Surveytypical cost to rectify a single recall event
— Industry Analysisreported more recalls than 5 years ago despite QC investments
— ETQ 2024 SurveyGet a Free Inspection Gap Analysis
Our engineers assess your current inspection coverage, identify where defects escape, and calculate the ROI of automated AI vision inspection.
When Defects Slip Through the Cracks
Critical vulnerability windows in manual inspection workflows.
Shift Transition Risk
40% of quality incidents occur during shift changes when handoff communication fails and inspector focus is lowest.
Circadian Vulnerability
Between 2-4 AM, human alertness drops to its lowest point—yet steel production continues at full speed.
AI Consistency
Automated systems maintain 99%+ accuracy regardless of time, shift, or environmental conditions.
AI Vision: Built for Steel Production Realities
How automated inspection overcomes every manual limitation.
Speed Matching
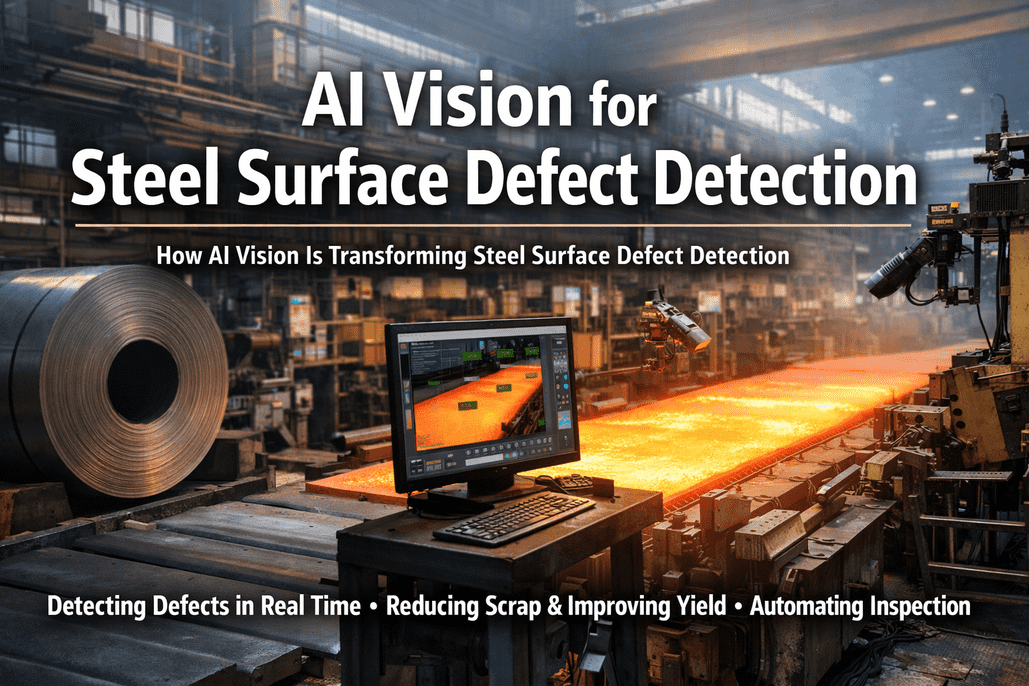
High-speed line-scan cameras capture 53,000+ lines per second, processing 7.5 GB of data per minute to inspect every millimeter at production speed.
Micro-Defect Detection
8K resolution cameras with 20-micron pixel accuracy detect microscopic cracks, inclusions, and surface anomalies invisible to human inspectors.
Zero Fatigue
Automated systems operate continuously without performance degradation, maintaining the same accuracy at 3 AM as at 9 AM—every single day.
Objective Standards
AI applies identical, measurable defect thresholds to every inspection—eliminating inspector-to-inspector variability and subjective accept/reject decisions.
100% Coverage
Every centimeter of every strip is inspected—no sampling, no statistical gaps, no defects escaping due to inspection coverage limitations.
Environment Proof
Industrial-grade systems with heat-resistant housings operate reliably in hot rolling environments, detecting defects at temperatures up to 1,000°C.
Ready to see AI vision in action on your production line? Contact our support team for a personalized demo.
What Manufacturers Achieve After Switching
Detection Accuracy
From variable human accuracy to consistent AI precision
Inspection Coverage
From statistical sampling to complete surface analysis
Defect Escapes
Dramatic reduction in customer-discovered defects
Scrap Rate
Early detection prevents value-added waste
Frequently Asked Questions
Common questions about transitioning from manual to AI-powered inspection.
Why can't we just hire more inspectors?
The problem isn't inspector quantity—it's biology. Even with more inspectors, each individual still faces fatigue limits, can't see microscopic defects, and can only sample 5-10% of production. More inspectors means more labor cost without solving the fundamental speed and accuracy gap.
How accurate is AI compared to our best inspectors?
Research shows human inspectors achieve 60-90% detection rates with significant variability. AI vision systems consistently achieve 99%+ accuracy while detecting defects as small as 0.05mm—below human visual capability—on 100% of production.
Can AI handle the extreme heat near hot rolling mills?
Yes. Industrial AI vision systems are specifically engineered for steel plant environments, with heat-resistant enclosures rated for temperatures up to 1,000°C, dust-proof housings, and vibration dampening. They maintain consistent accuracy where human inspection would be impossible.
What happens to our existing inspection staff?
AI automates tasks, not jobs. Inspectors transition to higher-value roles: validating AI flagged items, analyzing defect trends, optimizing processes, and managing quality systems. Most manufacturers redeploy inspection staff rather than reduce headcount.
How long does implementation take?
Typical deployments take 2-4 months from assessment to production use. The process includes site evaluation, camera and hardware installation, AI model training on your specific defect types, and validation against known samples before going live.
What's the ROI timeline?
Most steel manufacturers achieve full ROI within 8-14 months through combined savings: reduced scrap (typically 37% lower), fewer customer claims, lower rework costs, and avoided recall risk. Some facilities report payback as fast as 6 months.
Can AI detect new defect types it hasn't seen before?
AI systems use anomaly detection to flag unusual patterns even without prior training. When new defect types appear, they're flagged for human review, labeled, and the model retrains to recognize them going forward—continuously improving over time.
How do I get started?
Start with a free inspection gap analysis. We'll assess your current detection rates, identify where defects escape, calculate potential savings, and recommend a phased implementation approach tailored to your production environment.
Stop Missing Defects. Start Protecting Quality.
iFactory's AI vision systems are built for the realities of steel production—matching production speeds, detecting microscopic flaws, and operating 24/7 without fatigue.
