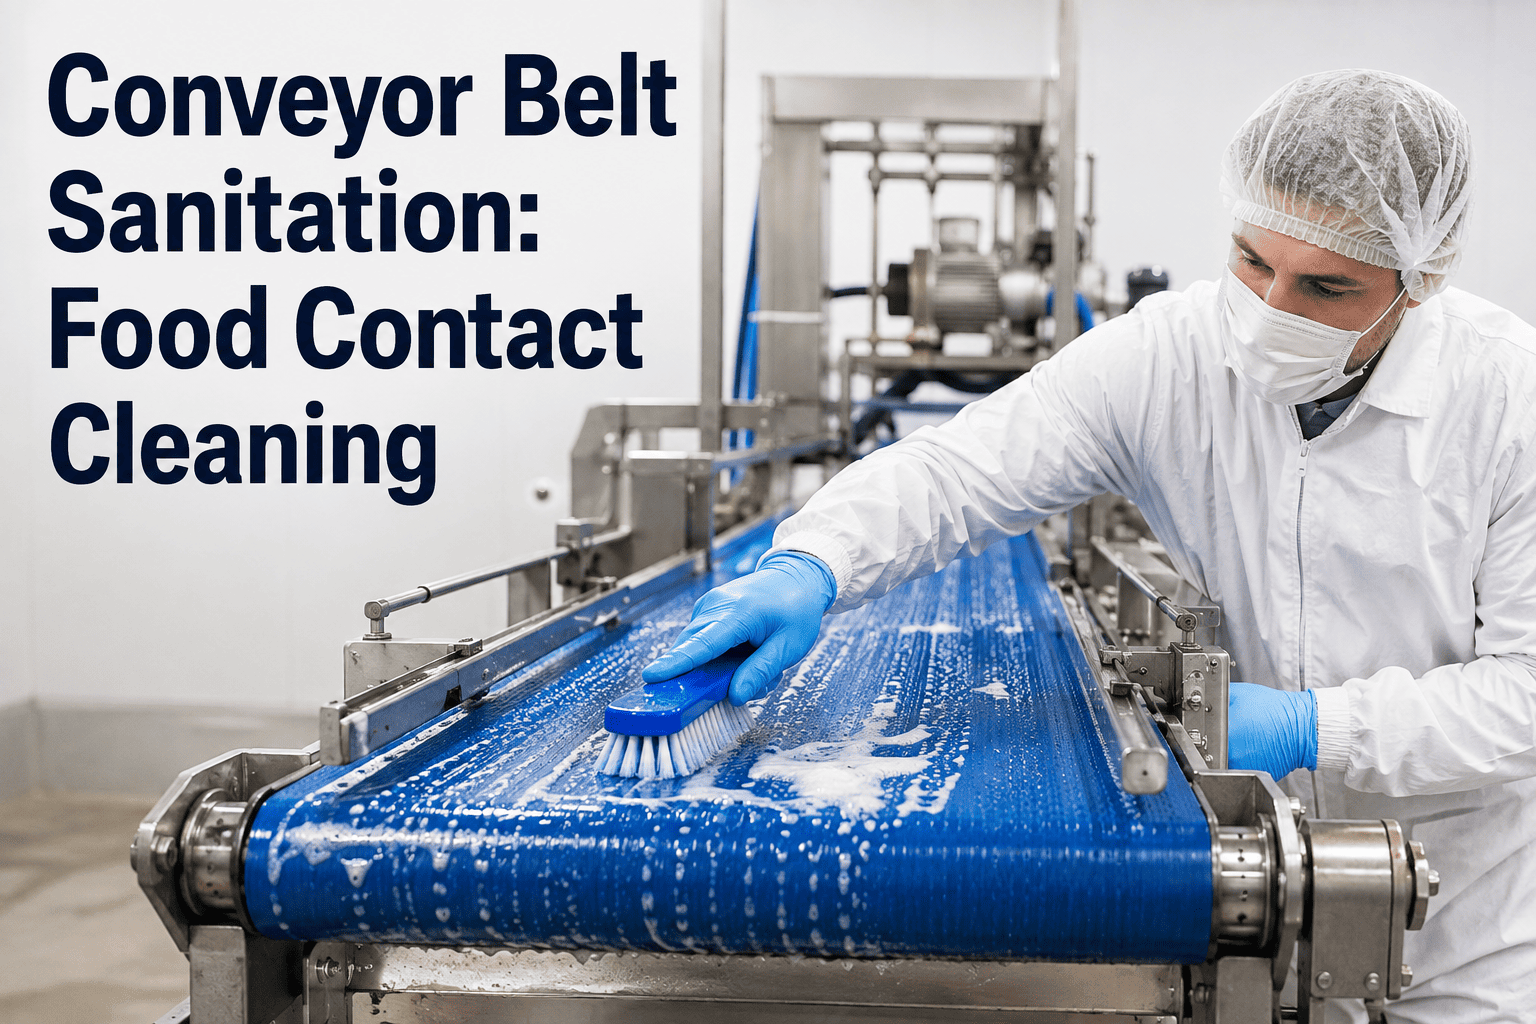
A conveyor belt is one of the largest continuous food contact surfaces in most processing plants, and unlike a mixing bowl or a knife blade, it is nearly impossible to remove from the line for a thorough soak or inspection between runs. Belt material, seam design, and splice construction all create microscopic harborage points where soil and biofilm accumulate even under a visually clean surface, and environmental monitoring programs consistently identify conveyor belts among the top sites for Listeria and other pathogen recovery in ready-to-eat processing. A defensible conveyor sanitation program combines the right belt material for the application, a validated cleaning and sanitizing method, and microbiological verification that confirms the cleaning is actually working rather than just looking clean. The gap between a belt that passes a visual pre-operational check and a belt that is genuinely free of harborage-based contamination is exactly where most recurring environmental findings originate, and closing that gap requires treating the belt as a system of distinct zones rather than one uniform surface. iFactory helps food processors structure, schedule, and verify conveyor belt sanitation across every line, with the workflow explained at iFactory support.
Conveyor Belt Sanitation · Sanitation Audits
Conveyor Belt Sanitation as a Food Contact Surface: Material, Method, and Verification
Belt material selection, cleaning method design, and microbiological verification structured to close the gap between a visually clean belt and an actually sanitary one.
Top 3
Conveyor belts rank among the most common Listeria recovery sites in RTE plants
Seams
Primary harborage point invisible to standard visual inspection
Weekly+
Typical minimum swab verification frequency for RTE belts
Belt Material Selection
Choosing a Belt Material That Can Actually Be Cleaned
Belt material selection is a sanitation decision as much as a mechanical one. The wrong material for the application can make thorough cleaning structurally impossible regardless of how good the cleaning procedure is, since porosity, seam design, and chemical compatibility all determine whether soil and microorganisms can actually be removed from the surface. A belt chosen purely for throughput speed or cost without weighing its cleanability against the product's risk category is a decision that shows up later as a recurring line item in the environmental monitoring program.
Modular Plastic Belts
Best for: wet processing, produce, meat and poultry lines
Interlocking modular links allow disassembly for deep cleaning and provide open drainage that reduces standing water. Hinge points and link edges still require targeted brush cleaning since they are the most common residue accumulation zones on this belt type.
Fabric & Woven Belts
Best for: bakery, dry snack, and non-wet applications
Woven construction is lightweight and flexible but the fiber structure absorbs moisture and oil, making full sanitization difficult without belt removal. Generally unsuitable for wet or high-microbial-risk applications without a validated exception process.
Solid Homogeneous PVC/PU Belts
Best for: general dry and semi-wet applications, packaging lines
Non-porous surface resists bacterial penetration and cleans readily with standard wash-down, but the belt splice — where the two ends are joined — remains the primary weak point requiring specific inspection and cleaning attention.
Stainless Steel Mesh & Wire Belts
Best for: high-temperature, oven, and freezer applications
Withstands high temperature cleaning and chemical exposure, but the mesh structure creates numerous small crevices that require pressure washing and, in high-risk applications, periodic disassembly for interior cleaning.
Where Contamination Actually Hides
The Belt Zones a Visual Inspection Misses
A pre-operational visual check catches gross soil on the exposed top surface, but the zones most associated with recurring pathogen recovery sit below, behind, or inside the belt structure where a walkthrough inspection simply cannot see. Building a cleaning and verification program around these six zones closes that visibility gap systematically rather than relying on an inspector happening to notice something out of place.
A
Belt Splice & Joints
The mechanical connection point where belt ends meet is rarely perfectly flush, creating a micro-gap that traps soil below the visible surface and resists standard wash-down pressure.
B
Underside & Return Path
The belt underside contacts rollers, drive components, and the frame continuously, accumulating grease, drips, and debris that never touch the product-facing surface but contaminate the environment around it.
C
Modular Link Hinges
Every hinge point in a modular belt is a moving mechanical joint with internal clearance where soil migrates and standard surface wiping cannot reach without disassembly or targeted flushing.
D
Frame & Support Structure
Guide rails, support beams, and tensioning hardware around the belt collect the same soil the belt does but are frequently excluded from the belt-specific cleaning SOP entirely.
E
Edge Guides & Side Rails
Product buildup accumulates at the belt edge where guide rails constrain product flow, an area often outside the direct spray pattern of standard wash-down equipment.
F
Drive Rollers & Tensioners
Mechanical components in constant belt contact accumulate the same residues as the belt surface but are commonly treated as equipment maintenance items rather than food contact cleaning targets.
The Cleaning Method Sequence
A Validated Conveyor Cleaning Procedure From Dry Debris to Final Verification
Each step in this sequence exists to set up the one after it. Skipping or shortening dry debris removal, for example, drives soil into seams under rinse pressure rather than removing it, which then defeats the detergent contact time step regardless of how well that step itself is executed. Treating the sequence as eight interdependent steps, rather than eight optional checkboxes, is what separates a cleaning procedure that validates from one that does not.
1
Dry Debris Removal
Gross product residue, packaging fragments, and loose debris removed by brush, scraper, or vacuum before any liquid is introduced, preventing soil from being spread or driven deeper into seams by water contact.
2
Pre-Rinse
Ambient or warm water rinse to remove remaining loose soil before detergent application, run at a pressure and temperature that will not set protein-based residue onto the belt surface.
3
Detergent Application & Contact Time
Foaming or circulating detergent applied to both the top surface and underside, with a validated contact time long enough for the chemical to break down fat, protein, and biofilm before mechanical action is applied.
4
Mechanical Action
Brushing at hinges, seams, and edge guides where spray pressure alone cannot dislodge trapped soil, using belt-safe brush materials that will not degrade the belt surface or introduce foreign material.
5
Post-Rinse
Full rinse of all detergent residue from every surface, including the underside and frame, since residual detergent can interfere with the effectiveness of the sanitizer applied next.
6
Sanitizer Application
Approved sanitizer applied at validated concentration and contact time across the full belt surface, with documentation of concentration verification for the batch used.
7
Air Dry or Controlled Drying
Belt allowed to air dry or run briefly under controlled conditions before product contact resumes, since residual moisture supports microbial regrowth even after effective sanitization.
8
Pre-Operational Verification
Visual pre-op inspection followed by ATP swab or equivalent rapid verification at defined sites before the line is released for production, with results logged before startup is authorized.
A Belt Can Pass Every Visual Pre-Op Check and Still Carry Listeria in the Splice or Hinge Gaps Where No One Is Looking.
iFactory schedules cleaning tasks by belt zone, tracks swab verification results against every site, and flags any belt with a pattern of recovery before it becomes a recall.
CIP vs. Manual Cleaning
Choosing the Right Cleaning Approach for Your Conveyor Design
Neither approach is universally superior — the right choice depends on belt geometry, product risk category, and how much of the harborage-prone geometry each method can actually reach. Many plants land on a hybrid: automated wash-down for daily cycles, paired with scheduled manual disassembly cleaning at a longer interval to address what the automated system cannot reach.
Factor
CIP / Automated Wash-Down
Manual Cleaning
Best Fit
Belts with integrated spray systems, high-throughput lines
Modular belts requiring disassembly, complex geometry lines
Consistency
High — parameters fixed and repeatable across every cycle
Variable — dependent on operator technique and diligence
Hidden Zone Coverage
Limited without belt-specific spray geometry design
Better for hinges and seams if procedure specifically targets them
Documentation
Automatic logging of parameters, time, temperature, concentration
Requires manual logging discipline at every step
Changeover Speed
Fast, supports frequent allergen or product changeovers
Slower, but allows targeted attention during longer downtime windows
Microbiological Verification
Confirming the Belt Is Actually Clean, Not Just Clean-Looking
Visual inspection and verification testing serve different purposes and neither substitutes for the other. A belt can pass every visual check and still carry a biofilm colony too thin to see, which is exactly why a layered verification approach — rapid indicator testing at every cycle, quantitative testing on a regular interval, and pathogen-specific testing per the environmental monitoring schedule — catches what a single method alone would miss.
ATP Bioluminescence
Every cleaning cycle, pre-operational
Rapid indicator of organic residue and general cleanliness, providing a pass or fail result within minutes so the line can be released or held for recleaning before startup.
Aerobic Plate Count Swabbing
Weekly to monthly per belt
Quantifies general microbial load on the belt surface, trended over time to catch a gradual cleaning effectiveness decline that a single ATP reading would not reveal.
Environmental Pathogen Testing
Per environmental monitoring program schedule
Listeria and other pathogen-specific testing at Zone 1 food contact sites including belt surface, splice, and hinge points, forming the core of the plant's environmental monitoring program for RTE lines.
Visual & UV Inspection
Every pre-operational check
Direct visual check plus UV light inspection to reveal protein or fat residue not visible under normal lighting, catching gross cleaning failures before microbiological results are even available.
Sampling Site Selection
Where to Swab on the Belt System for Meaningful Verification Data
Sample site selection determines whether a verification program produces actionable data or just a stream of passing results that miss the actual risk. Rotating sites systematically across the belt, rather than always testing the most convenient or most visible location, is what turns a swab program from a compliance exercise into a genuine early warning system.
01
Belt Splice Location
The single highest-priority swab site on any belt, since the splice is the documented weak point for harborage regardless of belt material or cleaning method used.
02
Random Hinge Points Across the Belt Width
Rotating selection of hinge locations across successive verification cycles rather than always testing the same spot, to build coverage of the full belt over time.
03
Belt Underside at the Return Path
Frequently excluded from swab programs entirely despite being a direct contamination source for the environment surrounding the product-contact surface above it.
04
Edge Guides and Side Rail Contact Points
Product buildup zones outside the primary spray pattern of most wash-down systems, warranting inclusion as a distinct site rather than assuming coverage from the main belt result.
05
Drive Roller and Tensioner Surfaces
Mechanical components in constant belt contact, included as Zone 2 sites when product contact indirect risk is credible for the specific line configuration.
Field Example
A Deli Meat Processor Resolving a Recurring Listeria Signal Traced to a Belt Splice Design
A ready-to-eat deli meat processor had experienced three positive environmental Listeria findings over eighteen months, each traced back to swab sites on or near the same slicing line conveyor belt. Standard corrective actions of intensified cleaning and re-verification had resolved each individual finding, but the recurring pattern at the same general location indicated a structural issue rather than a one-time cleaning lapse, and the plant's next GFSI audit was approaching with the recurring finding pattern likely to draw scrutiny.
A focused investigation using targeted swabbing at the belt splice, hinge points, and underside identified the mechanical splice design as the harborage source, with soil accumulating in a gap the standard wash-down spray pattern did not fully penetrate. The plant replaced the belt with a modular design using a different splice configuration validated for easier disassembly, added the splice and hinge zones as standing weekly swab sites with trending review, and revised the cleaning SOP to include a specific brush step targeting the new splice geometry.
Fourteen months after the change, the line has recorded zero positive environmental findings at any of the belt-associated sites, and the swab site structure developed for this line has since been adopted as the standard verification template for all RTE slicing line conveyors across the plant's other production lines. The sanitation manager credited much of the resolution's durability to the shift from generic weekly belt swabbing toward site-specific trending, which meant the team could see the splice zone's readings improving over successive weeks rather than only knowing pass or fail on a given day. The plant's next GFSI audit, which had been a source of internal concern given the recurring finding history, closed with no findings related to the conveyor program, and the auditor specifically noted the site-level trending data as evidence of a mature root cause investigation process rather than a reactive cleaning response.
3 findings
Recurring Listeria signal over 18 months, resolved
14 months
Zero positive findings since belt and SOP change
Plant-wide
Swab template adopted across all RTE lines
Frequently Asked Questions
What Sanitation Teams Ask Before Redesigning Their Belt Cleaning Program
How often should a conveyor belt receive full disassembly cleaning versus standard wash-down?
Full disassembly frequency depends on belt type, product risk category, and cleaning method. Modular plastic belts on ready-to-eat lines are commonly disassembled for deep cleaning on a weekly to monthly basis depending on the plant's risk assessment and environmental monitoring history, with standard wash-down performed daily or between shifts. Belts on lower-risk dry applications may follow a longer disassembly interval, but the decision should be documented and tied to actual verification data rather than an arbitrary calendar interval. A belt with a clean verification history over an extended period may support extending the disassembly interval, while any positive environmental finding should trigger disassembly regardless of where it falls in the standard schedule. Some plants build a tiered schedule where disassembly frequency is explicitly tied to the belt's environmental monitoring performance, effectively rewarding a demonstrated clean record with a longer interval rather than treating every belt on the plant identically regardless of its individual history. To calibrate disassembly frequency to your specific belt and risk profile,
book a demo.
Can a belt be sanitized effectively without being taken off the line?
In-place cleaning can be effective for the belt's exposed surface and, with a properly designed spray system, for a meaningful portion of the underside as well, but certain harborage points — internal hinge clearances on modular belts, the interior of the splice joint, and areas shadowed by frame components — are difficult or impossible to reach without removing the belt or disassembling the affected section. The practical approach most plants use is a combination: frequent in-place cleaning covering the accessible surfaces, paired with periodic scheduled disassembly for the harborage-prone zones that in-place methods cannot reliably reach. Relying exclusively on in-place cleaning for a belt with known harborage geometry is a common root cause identified during Listeria trace-back investigations, and it is worth asking during a program review whether the current cleaning method was ever actually validated against the belt's specific hinge or splice design, or whether it was inherited from a generic sanitation SOP template that assumed a simpler belt structure than the one actually installed.
What is the difference between Zone 1 and Zone 2 sampling as it applies to conveyor belts?
Zone 1 refers to surfaces in direct food contact — the belt's product-carrying surface, splice, and any component that touches the product itself. Zone 2 refers to surfaces near food contact areas that could cross-contaminate Zone 1 through splash, drip, or operator contact, which for a conveyor system typically includes the frame, guide rails from the non-contact side, and drive components positioned close to the belt. Some plants extend the model further to Zone 3 and Zone 4 for general room surfaces and drains, but for conveyor-specific programs the Zone 1 and Zone 2 distinction is usually the one that most directly drives corrective action severity and root cause investigation depth. Environmental monitoring programs generally weight Zone 1 sites more heavily in both frequency and corrective action severity, since a Zone 1 positive represents direct product contamination risk while a Zone 2 positive represents a precursor risk that has not yet reached the product but could migrate there without intervention. A well-designed conveyor swab program treats the two zones as connected rather than isolated, since a persistent Zone 2 finding near a belt is a leading indicator that Zone 1 contamination is likely to follow if the underlying source is not addressed.
How does iFactory support conveyor belt sanitation programs day to day?
iFactory schedules and tracks every cleaning task by belt and by zone — dry debris removal, wash-down, disassembly cleaning, and pre-operational verification — with completion logging and photo evidence tied to each task. Swab verification results are logged against defined sampling sites including the splice, hinge points, underside, and edge guides, with trending review that flags any site showing a pattern of elevated readings before it escalates to a confirmed pathogen finding. Pre-operational release can be gated on verification completion, so a line cannot start production until its cleaning and verification tasks for that cycle are confirmed complete. Historical swab data stays attached to the specific belt and site over its full service life, so a belt replacement or splice repair can be evaluated against the exact before-and-after verification record rather than a general plant-wide average that would dilute the signal from any single line. To see the belt sanitation workflow configured against your specific line layout and belt types,
book a demo.
Turn Conveyor Belt Sanitation From a Visual Check Into a Verified, Documented Control Point.
Material selection, zone-specific cleaning, and microbiological verification — structured across every belt, every shift, every line.