AI Automotive Glass Inspection for Windshields and Sidelites

By Josh Brook on October 22, 2026

ai-automotive-glass-inspection-windshields-sidelites

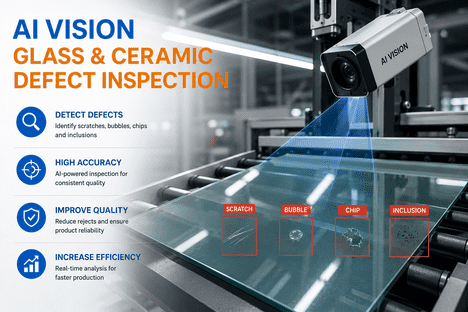
A windshield can pass every strength test and still fail the driver. A small bubble in the PVB sitting in the driver's line of sight, a pinhole in the black frit band or a slight lens effect in front of the ADAS camera can each turn a good lite into a warranty claim. Automotive glass inspection with AI vision checks every lite at every key step, classifies each defect by type, size and zone, and holds the ones that matter before they reach HUD or camera fitment. See it on real glazing images in a short windshield inspection demo.

AI VISION · AUTOMOTIVE GLAZING

Catch Windshield and Sidelite Defects Before They Reach the Car

iFactory Vision Defect Detection puts cameras after edge grinding, frit printing, bending and tempering, lamination and final inspection. The AI classifies every defect by type, size and zone, holds the lite and links it to the step and shift that made it.

Lite W-8812 · Final inspectionHOLD
HUD windscreen · Line 2 · Shift B
PVB bubbleZone A · Hold
Frit pinholeFrit band · Accept
Hairline scratchZone B · Review
SeedCamera window · Hold
Zone A2 holds1 review
Linked to autoclave cycle 14 · Shift B
WINDSHIELD DEFECT DETECTION BY ZONE

Not Every Square Centimetre of Glass Is Equal

A bubble in the frit band is invisible to the driver. The same bubble in front of the driver's eyes is a reject. That is why windscreen quality is judged by zone. UN Regulation No. 43 defines test areas from the driver's V points for cars (M1) and caps optical distortion at 2′ of arc in Zone A and 6′ of arc in reduced Zone B. The AI maps each defect to a zone before it decides anything. Ask our glazing support team how zones are set up from your OEM drawing.

Zone A
Driver's critical viewR43 limit for M1 windscreens: 2′ of arc distortion. Set your tightest point-defect and scratch limits here.
HUD area
Projection area for the head-up displayGhost image and wedge angle matter more here than point size. Check against the HUD drawing.
Camera window
Clear glass inside the frit for ADASAny defect, haze or lens effect here changes what the camera sees. Treat it as a camera issue first.
Zone B
Wider field of viewR43 limit for M1 windscreens: 6′ of arc. Point limits can be looser than Zone A if the OEM drawing allows.
Peripheral strip
Outer 100 mmR43 allows up to 6′ of arc in a 100 mm peripheral area of Zone A or Zone I.
Frit band
Opaque ceramic printNo see-through optics to test. Inspect print coverage, pinholes and the print edge line instead.
Buses and trucks use Zone I

For vehicles other than cars, R43 uses Zone I. It is drawn from an eye point 625 mm above the seat R point, bounded by fixed angles set out in the regulation's annex, with the same 2′ of arc distortion limit.

TEMPERED GLASS DEFECTS AND PVB INTERLAYER DEFECTS

Where Each Defect Is Born on the Line

Most glazing defects are made at one step and found at another, often hours later at final inspection. A shell chip from the grinder, a smear from the frit screen and a bubble from a weak de-air cycle all look like "reject" on a paper sheet. Cameras placed after each step catch the defect where it was born, so the fix goes to the right machine. Sidelites and backlites are usually bent and tempered as single lites, while windscreens are bent as a pair and laminated with a PVB interlayer, and laminated sidelites follow the same route. Walk your own line with our glazing vision engineers.

1Float glass inStones, seeds and bubbles, knot lines, tin pick-up, handling scratches
2Cut and edge grindShell chips, shiners left unground, grinding burns, vents from the edge
3Print ceramic fritPinholes, voids, smears, edge misregistration, missing or extended print
4Bend, temper or lay upRoller wave and strain on tempered lites. Ply mismatch, PVB wrinkles and trapped dirt on laminates
5De-air and autoclaveInterlayer bubbles, air pockets, edge delamination, haze
6Final and assembly prepLate scratches, edge chips, missing marks, bracket and primer faults
OPTICAL DISTORTION MEASUREMENT AND LIGHTING

Five Ways to Light Glass, and What Each One Sees

Clear glass hides its own defects. A camera only sees a bubble, a scratch or a lens effect when the light is set up to reveal it, which is why glazing lines use more than one lighting method. Transmitted light shows dark point defects, while reflected light is needed to identify tin pick-up. Distortion is measured as optical power, usually in millidiopters, either through the glass against a grid or by reflecting a fringe pattern off the surface. Our vision support team can help you choose for each station.

Lighting method
How it works
What it shows
Best station
Bright field
Backlight shines through the glass toward the camera
Bubbles, stones and dirt as dark spots
Float glass in, final
Dark field
Low-angle light from the side, camera above
Scratches, chips and edge flaws that scatter light
Edge grind, final
Grid or zebra in transmission
Camera looks through the lite at a striped board
Bent stripes, turned into optical power in millidiopters
Bend, final distortion
Deflectometry
A fringe pattern is reflected off the surface
Local slope, reflected distortion and shape
Bend and temper, HUD
Polarised strain
Glass viewed between crossed polarisers
Stress patterns from quenching and at laminate edges
After tempering

Know Which Step Made the Defect, Not Just That It Exists

iFactory links every held lite to the station, cycle and shift that produced the defect. Quality engineers ask in plain words and get the pattern, the evidence and the lites at risk.

Line 2 · Quality engineer and iFactory
Quality engineerWhy did final hold four windscreens in Zone A this morning?
iFactoryAll four are PVB bubbles near the lower edge of Zone A. All came from autoclave cycle 14. Cycles 13 and 15 are clean.
Quality engineerHold the rest of cycle 14 and check the de-air step.
iFactoryDone. The rest of cycle 14 is on hold, and the pre-press roller log for that cycle is attached.
LAMINATED GLASS BUBBLE DETECTION BY SIZE AND ZONE

One Defect Size, Four Different Answers

A fixed size limit across the whole lite either rejects good glass or ships bad glass. The matrix below shows how the AI combines size class and zone into a decision. It is an illustration only. The real size bands and counts come from your OEM drawing and control plan, and the system applies exactly what you load. Build your own matrix with our quality vision team.

Point defect size class
Zone A
HUD area
Camera window
Zone B
Peripheral strip
Frit band
XS · below plant noise floor
Accept
Count
Count
Accept
Accept
Accept
S · smallest limited size
Count
Review
Review
Accept
Accept
Accept
M · mid band
Hold
Hold
Hold
Count
Count
Accept
L · upper band
Hold
Hold
Hold
Review
Review
Count
XL · above any limit
Hold
Hold
Hold
Hold
Hold
Review
Linear · scratch or hairline
Hold
Hold
Hold
Review
Count
Accept
Accept
Pass, with the defect logged on the lite record
Count
Pass while the count per zone stays within limit
Review
Images sent to an inspector to judge
Hold
Lite stopped and flagged with its source step
HUD WINDSHIELD QUALITY AND ADAS CAMERA ZONE INSPECTION

Two Small Areas That Carry the Biggest Risk

A head-up display uses the windscreen as a mirror. Light reflects off both the inner and the outer glass surface, so the driver can see a main image and a fainter ghost. HUD windscreens use a wedge-shaped PVB interlayer so the two surfaces are not parallel and the images overlap. A fixed wedge gives full overlap only at a point or along a line, which is why some designs vary the wedge angle. The ADAS camera has a different problem. It looks through a small clear window in the frit, and any lens effect, point defect or haze there changes what the camera sees. Talk to our support engineers about inspecting both areas.

HUD AREA
  • Ghost image separation checked in the HUD eye box
  • Wedge angle and interlayer thickness profile
  • Reflected distortion and shape by deflectometry
  • Point defects judged against the HUD drawing
ADAS CAMERA WINDOW
  • Every point defect in the window held for review
  • Optical power and haze across the camera's view
  • Frit edge around the window clean and in position
  • Bracket and primer present for camera mounting
AUTO GLASS SUPPLIER QUALITY KPIS

Six Numbers Worth Tracking From Day One

When a car plant reports a ghost image or a bubble in the driver's view, the glass supplier needs to answer fast: which lites, which day, which step. A paper tally can count rejects, but it cannot link a defect to the lite, the zone and the autoclave cycle. A lite record with images can, and it turns into the measures below. See a full lite record in a live record walkthrough.

Holds by zoneHeld lites per thousand, split by Zone A, HUD, camera window and Zone B
Defects by source stepShare of defects born at grinding, frit print, bending, autoclave and final
Review agreementHow often inspector reviews confirm the AI decision
Distortion coverageShare of lites with a distortion reading, not just a lab sample
Customer claimsGlazing claims per thousand lites shipped, by defect type
Time to causeHours from the first hold to a confirmed source step
SIDELITE GLASS QC COST AND ROI

Size the Inspection Load With Your Own Numbers

The value of catching a defect before it ships depends on your contracts, your OEM penalties and your scrap costs, which only you know. Instead of a savings claim, this worksheet sizes the inspection load. Every input is assumed. Replace them with your own figures and the arithmetic stays the same. Our support team can help you build a fuller case.

Lites per shift1,200, assumed
Seconds of manual look per lite at final15, assumed
Lab distortion checkOne lite in 150, assumed
Shifts per day3, assumed
Manual look time per shift1,200 × 15 s = 18,000 s = 5 h
Lites measured for distortion per shift, lab sample1,200 ÷ 150 = 8
Lites with a full record per day, inline1,200 × 3 = 3,600

Add your own scrap cost per lite, OEM claim costs and the cost of a containment sort. Keep them out of the sum unless your own records support them.

GLASS EDGE GRINDING INSPECTION AND ROLLOUT CHECKLIST

A Rollout Checklist for Your Glazing Line

Tick through these items as you plan cameras, zones and limits. Most of the work is agreeing the rules before the first camera goes up. Plan the first station in a rollout planning call.

1Before cameras
2During the shadow run
3At go-live
TURNKEY AI DEPLOYMENT

Cameras, Lighting and Edge Server Delivered as One Package

iFactory delivers Vision Defect Detection as a turnkey system. Cameras and lighting are fitted at your chosen stations, and a pre-configured NVIDIA AI server ships racked and ready with the glazing defect models loaded, so images are processed on site at line speed. You rack it, plug in power and Ethernet, and the AI is live. To scope it for your line, talk to our deployment team.

What's Included
  • Pre-configured NVIDIA AI edge server, racked and ready
  • Cameras and lighting matched to each station
  • Defect models tuned on your own glass images
  • Zone maps loaded from your OEM drawings
  • Lite hold signals to your line controls
  • Lite records with images, zones and source step
  • 24×7 remote monitoring of models and hardware
Live in 6–12 weeks
Wk 1–4
Survey and Install

Stations agreed, cameras, lighting and server installed, zone maps and limits loaded.

Wk 5–8
Tune and Shadow

Models tuned on your glass and run silently beside your inspectors.

Wk 9–12
Go-Live and Training

Hold logic switched on, inspectors trained, daily trend review started.

HOW iFACTORY FITS

Vision Defect Detection Built for Glazing Lines

iFactory is built for the way glass is made: many steps, defects that surface late and tight zone rules from the car maker. See how it fits your line in a pilot walkthrough.

1
Cameras at five steps. After edge grinding, frit printing, bending and tempering, lamination and final.
2
Classifies by type, size and zone. Every defect is placed on the lite's zone map before a decision.
3
Holds the lite. Lites outside your limits are stopped and sent to review with images.
4
Links defects to step and shift. Trends show which machine, cycle or shift to fix.
1000+
Industrial clients running iFactory
99.9%
Platform uptime for round-the-clock lines
6-12 wks
From racked server to live lite holds
FREQUENTLY ASKED QUESTIONS

What Glazing Quality Teams Ask About AI Inspection

What does AI automotive glass inspection check?
It checks each lite for point defects such as bubbles, seeds and stones, linear defects such as scratches, edge flaws from grinding, frit print faults such as pinholes and misregistration, and interlayer faults such as air pockets and edge delamination. Each defect is classified by type, size and zone, and the lite is accepted, counted, sent to review or held.
Does it replace ECE R43 glazing type approval tests?
No. UN R43 and, in the US, FMVSS 205 with ANSI/SAE Z26.1 set the tests a glazing design must pass, such as a minimum light transmittance of 70% for windscreens and optical distortion limits by zone. Those tests stay with your lab and the approval authority. Inline inspection checks that each production lite matches the approved design and your OEM drawing.
Can it inspect tempered sidelites as well as laminated windscreens?
Yes. Tempered sidelites and backlites are checked for edge flaws, point defects, scratches and reflected distortion, with polarised light used to see strain patterns. Laminated windscreens and laminated sidelites add interlayer checks after the autoclave. Each part number has its own zone map and limits.
How does it handle the HUD area and the ADAS camera window?
Both are treated as separate zones with their own rules. In the HUD area, ghost image, wedge and reflected distortion matter alongside point defects. In the camera window, any defect, haze or lens effect is flagged because it changes what the camera sees.
Where do the acceptance limits come from?
From you. Size bands, counts per zone and distortion limits come from the OEM drawing, the customer specification and your control plan. iFactory applies exactly those rules and keeps a record of every decision. It does not ship generic limits.
How do we start?
Start with one station where defects cost the most, often final inspection on a HUD windscreen line. Load the zone map and limits, run the cameras silently beside your inspectors, then switch on lite holds. Our support team can plan that first station with you.

Put Every Lite Through the Same Careful Eye

Cameras after each key step, defects classified by type, size and zone, held lites linked to the step and shift that made them. Delivered turnkey and live in 6 to 12 weeks.


Example lite record · Line 2
LiteW-8812, HUD windscreen
DefectPVB bubble, Zone A
Source stepAutoclave cycle 14
DecisionHeld for inspector review
Every lite traceable to step and shift

Share This Story, Choose Your Platform!